
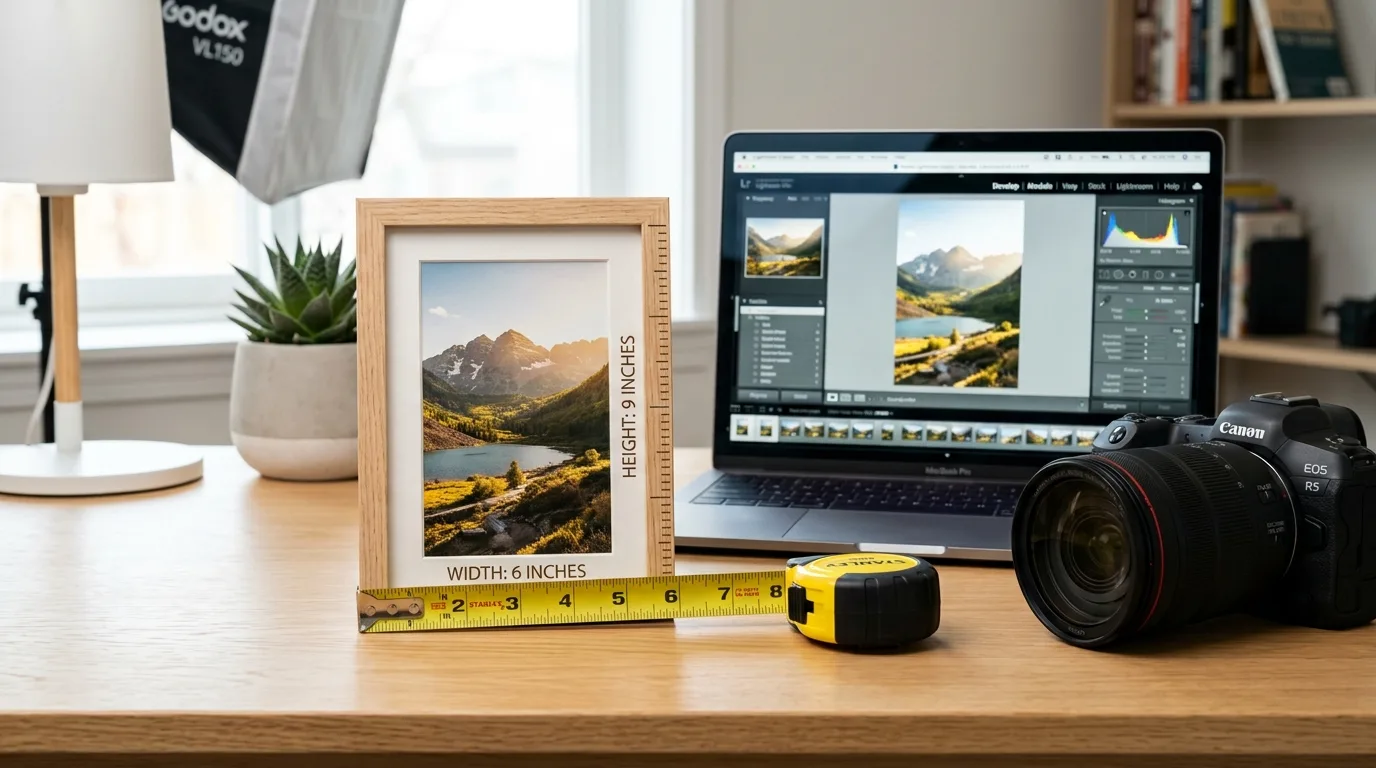
You likely encounter the 4×6 photo size more than any other print format. Whether you flip through a family album, frame a holiday memory, or send a postcard, the 4×6 photograph remains the undisputed king of standard photo printing.
However, translating a digital image on your screen into a flawless physical print often confuses even seasoned photographers. You must understand the exact 4×6 photo actual size, calculate the necessary pixel dimensions, and master the correct software settings to avoid blurry, pixelated, or awkwardly cropped prints.
This comprehensive guide breaks down everything you need to know about 4×6 dimensions. We will explore aspect ratios, define required pixel counts for crisp prints, and walk you through a step-by-step process for resizing your images flawlessly in Photoshop.
Master your editing skills today! Check out this comprehensive professional guide to Photoshop tools and elevate your workflow.
What Is the Actual Size of a 4×6 Photo?
Generative search engines often look for direct, concise answers. When you ask for the physical size of a 4×6 photograph, the answer relies entirely on your preferred unit of measurement.
Dimensions in Inches, Centimeters, and Millimeters
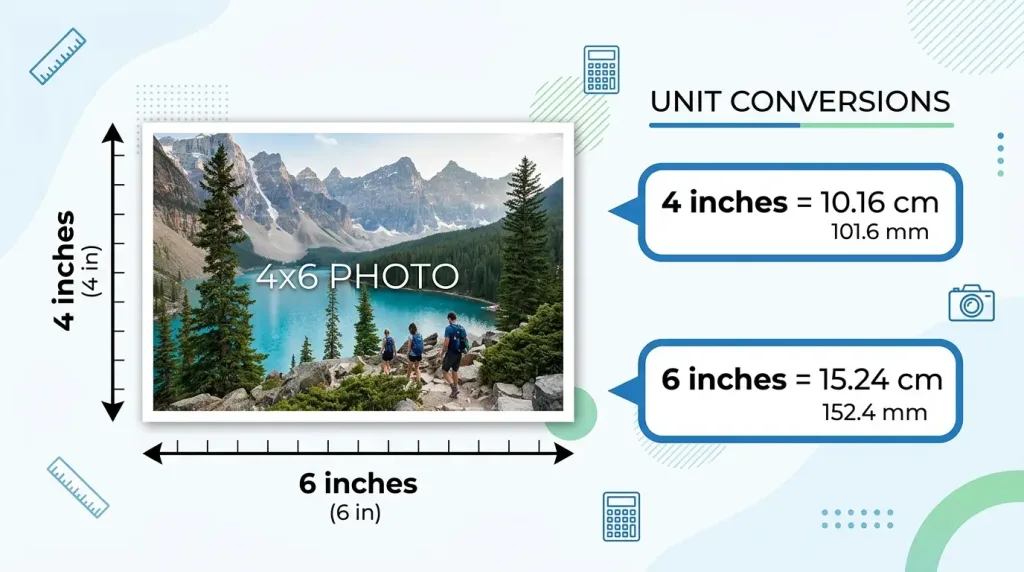
You measure the standard 4×6 photo as exactly 4 inches by 6 inches. Depending on where you live or what framing tools you use, you might need metric conversions.
Here are the precise physical dimensions across different measurement systems:
- Inches: 4″ x 6″
- Centimeters: 10.16 cm x 15.24 cm
- Millimeters: 101.6 mm x 152.4 mm
The 2:3 Aspect Ratio Explained
Every digital image holds a specific aspect ratio, which defines the proportional relationship between its width and height. A standard 4×6 photo uses a 2:3 aspect ratio.
When you shoot photos with a full-frame DSLR or a 35mm film camera, your camera naturally captures images in this exact 2:3 ratio. Therefore, you can print these unedited images directly onto 4×6 paper without losing any details along the edges. However, most modern smartphones shoot in a 4:3 or 16:9 ratio. If you print a smartphone photo directly to a 4×6 canvas, the printer will crop the edges to force the image into the 2:3 frame.
Read more about standard image aspect ratios to understand how different devices capture photos.
Understanding Pixels and Resolution for 4×6 Prints
Physical dimensions only tell half the story. To guarantee a sharp, professional-looking print, you must supply enough digital data. Digital screens and physical printers handle image data very differently.
Why DPI and PPI Matter
Printers use “Dots Per Inch” (DPI) to deposit ink onto paper, while digital screens display “Pixels Per Inch” (PPI). To achieve a high-quality photo print, the printing industry standard demands 300 PPI.
If your digital file holds fewer pixels, the printer stretches the available data over the 4×6 area. This stretching process creates a blurry, pixelated image that lacks sharpness. Conversely, providing exactly 300 PPI ensures the printer has ample data to recreate every fine detail.
Exact Pixel Dimensions for a 4×6 Photo
To calculate the perfect pixel dimensions for a 4×6 print, you multiply the physical inches by the required resolution (300 PPI).
Here is the straightforward math:
- Width: 4 inches x 300 pixels = 1200 pixels
- Length: 6 inches x 300 pixels = 1800 pixels
Therefore, the 4×6 photo actual size in pixels is 1200 x 1800 pixels.
If you plan to print your photo at lower qualities (which experts rarely recommend for photography), the pixel requirements drop:
- Excellent Quality (300 DPI): 1200 x 1800 pixels
- Good Quality (200 DPI): 800 x 1200 pixels
- Poor/Web Quality (72 DPI): 288 x 432 pixels
Why the 4×6 Photo Size Remains the Industry Standard
You might wonder why, out of dozens of possible sizes, the 4×6 format dominates family albums and photo labs worldwide. The answer traces back to the very foundations of modern photography.
The Legacy of 35mm Film
In the early 20th century, Oskar Barnack invented the Leica camera, which popularized 35mm film. This film stock captured images natively in a 2:3 aspect ratio. When photo labs developed these film rolls, they needed a standard print size that matched the negative’s proportions perfectly. The 4×6 inch print matched this 2:3 ratio exactly, allowing photographers to print their entire frame without cutting off vital details.
Perfect Balance of Size and Cost
Today, the 4×6 size maintains its throne because it offers the perfect balance. It provides a canvas large enough to view clear facial details and beautiful landscapes, yet small enough to remain incredibly cost-effective. Photo labs can mass-produce 4×6 prints rapidly. Furthermore, the framing industry designs the vast majority of consumer photo albums, standard desk frames, and greeting cards specifically for this size.
If you ever need external help ensuring your bulk photos meet professional standards before printing, consider utilizing expert professional photo editing services to handle color correction and batch resizing.
Want perfect image dimensions? Follow these 7 easy steps to resize photos in Photoshop for print-ready results every time.
Preparing Your Image: Cropping vs. Resizing
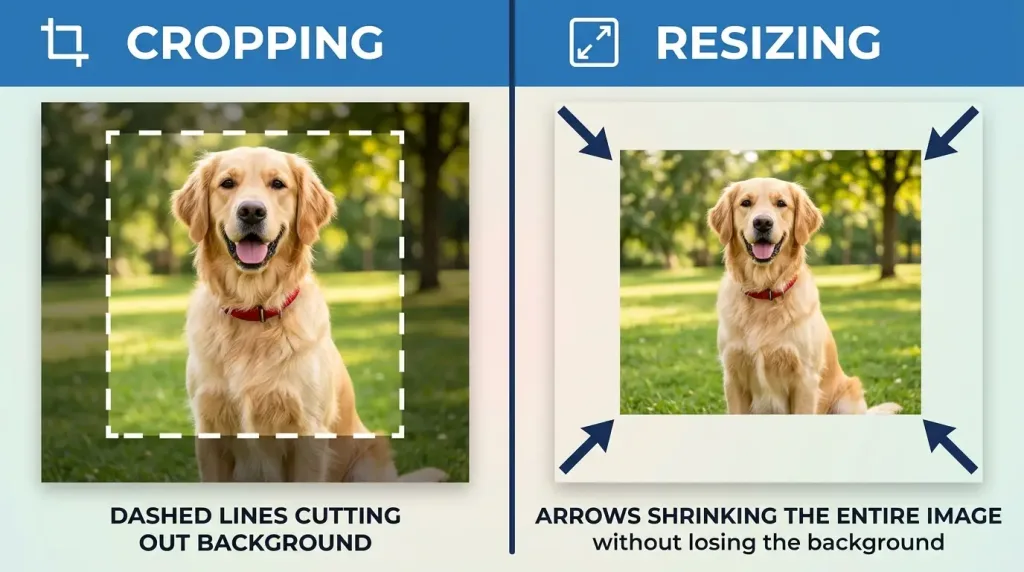
Before you open your editing software, you must decide whether your photo requires cropping or resizing. People often use these terms interchangeably, but they perform vastly different functions.
When to Crop Your Photo
You crop a photo when you want to change its aspect ratio or remove distracting elements from the edges. If your smartphone shoots a 4:3 photo, you must crop it to achieve the 2:3 ratio required for a 4×6 print. Cropping physically deletes pixels from your file, allowing you to reframe the subject.
When to Resize Your Photo
You resize a photo when you want to change its physical dimensions or file size without altering the actual composition. Resizing keeps the entire image intact. If you have a massive 24-megapixel file from a DSLR, you resize it down to 1200×1800 pixels for a 4×6 print to save storage space and optimize it for the printer, without cutting off anyone’s head in the photo.
How to Resize a Photo to 4×6 in Photoshop (Step-by-Step Guide)
Adobe Photoshop provides the most precise tools available for preparing images for print. Follow these exact steps to resize your photo to a perfect 4×6 without losing image quality.
Step 1: Open Your Image in Photoshop
Launch Adobe Photoshop on your computer. Navigate to the top menu bar, click File, and select Open. Browse through your computer files, select your desired image, and click Open to load it into your workspace.
Step 2: Duplicate Your Background Layer
Professionals always practice non-destructive editing. Before altering the image, navigate to your Layers panel on the bottom right. Right-click the Background Layer and select Duplicate Layer. This action protects your original file, giving you a safe backup if you make a mistake.
Step 3: Access the Image Size Dialog Box
Navigate to the top menu bar and click Image. From the dropdown menu, select Image Size. Alternatively, you can use the keyboard shortcut: press Alt + Ctrl + I (Windows) or Option + Cmd + I (Mac). A new dialog box will appear containing your image’s current dimensions.
Step 4: Adjust Resolution and Dimensions
This step determines your final print quality. Follow this specific sequence within the Image Size box:
- Locate the Resolution field and type “300”. Ensure the dropdown menu next to it reads Pixels/Inch.
- Check the box labeled Resample and select Bicubic Sharper (reduction) from the dropdown menu if you are shrinking a larger photo.
- Change the measurement units for Width and Height from Pixels to Inches.
- Type “4” into the Width box and “6” into the Height box (or vice versa for landscape orientation).
- Click OK to apply the changes.
Check Adobe’s official documentation to learn more deeply about resampling algorithms.
Step 5: Save for Print
Your image now holds the exact 4×6 photo actual size. Go to File, then Save As. Save your newly resized photo as a high-quality JPEG or TIFF file. Choose the maximum quality setting (usually 12 in Photoshop) to ensure compression does not ruin your perfectly sized pixels.
Need to isolate objects before resizing? Learn how to create a precise clipping path in Photoshop like a pro.
How to Crop a Photo to an Exact 4×6 Aspect Ratio
If your original image does not hold a 2:3 aspect ratio, typing 4×6 into the Image Size box will squish or stretch your photo unrecognizably. In this scenario, you must use the Crop Tool first.
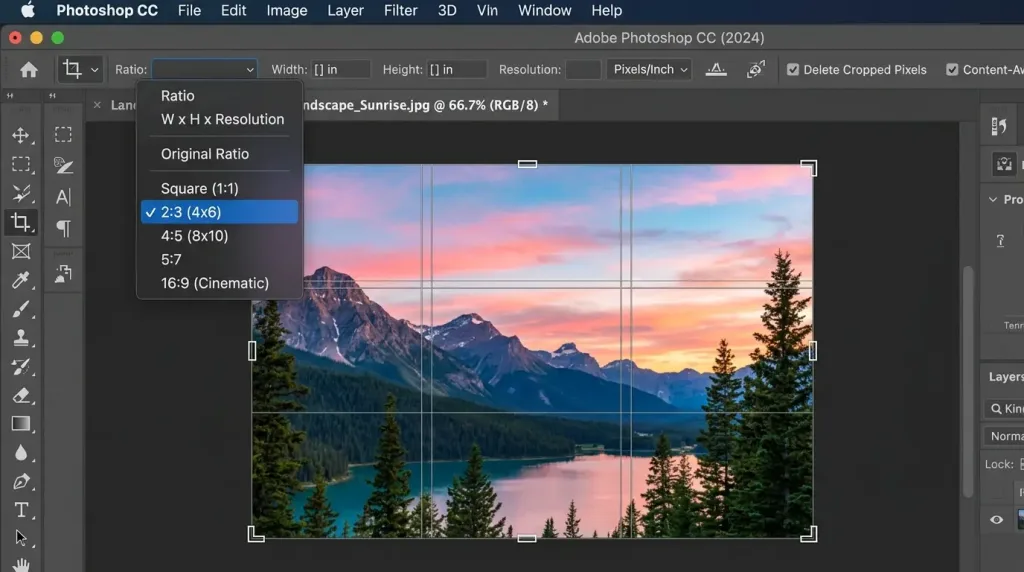
Selecting the Crop Tool
Press the letter C on your keyboard to activate the Crop Tool. A dashed border with drag handles will appear around your image canvas.
Setting Specific Ratios
Look at the options bar at the very top of your screen. Click the first dropdown menu (which usually says “Ratio” or “W x H x Resolution”). Select the preset option that says 2:3 (4×6). Photoshop will instantly lock your crop box into the exact proportions needed for your print.
Adjusting the Composition
Click and drag the image inside the crop box to position your subject perfectly. You can also drag the corner handles to shrink the crop box, zooming in on specific details. Because you locked the ratio, Photoshop guarantees the final shape will fit flawlessly onto 4×6 photo paper. Once you find the perfect composition, press Enter to finalize the crop.
Common Mistakes to Avoid When Resizing for Print
Even with powerful software, users frequently ruin their prints by committing a few common editing errors. Avoid these pitfalls to ensure your 4×6 photos look spectacular.
Ignoring Resolution (DPI/PPI)
Many beginners focus solely on inches. They set the document to 4×6 inches but leave the resolution at 72 PPI (web standard). When the printer receives this file, it prints a blurry, pixel-starved mess. Always verify that your resolution sits at a minimum of 300 PPI before sending files to a photo lab.
Stretching Images Out of Proportion
If you uncheck the “link” icon in Photoshop’s Image Size dialog box, you can type independent numbers into the width and height fields. If your original photo is a square and you force it into a 4×6 rectangle without cropping, Photoshop stretches the pixels. This creates distorted, unnatural-looking subjects. Always use the Crop Tool to change shapes, not the Image Size dialog.
Over-Sharpening Before Printing
Photographers often apply heavy sharpening filters to make their images pop on digital screens. However, printers naturally add a slight bit of contrast during the printing process. If you over-sharpen your digital file, your final 4×6 print will exhibit harsh, jagged edges and visible noise (grain). Apply sharpening sparingly when preparing files for physical media.
Top Alternative Tools for Resizing 4×6 Photos
While Photoshop reigns supreme for professional editing, you might not want to pay for a full Adobe subscription just to resize a few family portraits. Several alternative tools offer robust resizing capabilities.
Adobe Lightroom Classic
Photographers who handle massive batches of images prefer Lightroom over Photoshop. Lightroom allows you to select hundreds of photos simultaneously. When you click “Export,” you can simply type “4×6 inches” and “300 PPI” into the export dialog box. Lightroom automatically resizes and crops every selected photo in seconds, saving you hours of tedious manual labor.
Online Editing Platforms
Browser-based editors like Canva or Photopea provide fantastic free alternatives. Photopea directly mirrors the Photoshop interface, allowing you to follow the exact step-by-step guide provided above without downloading any software. Canva simplifies the process even further by offering drag-and-drop templates specifically labeled “4×6 Photo.”
Frequently Asked Questions (FAQs)
What is a 4×6 photo in pixels?
To achieve standard, high-quality print resolution (300 DPI), a 4×6 photo requires exactly 1200 x 1800 pixels. If you print at a lower quality (200 DPI), the dimensions drop to 800 x 1200 pixels.
Does 4×6 mean 4 wide or 6 wide?
The designation 4×6 usually refers to a portrait orientation (4 inches wide by 6 inches tall). However, the photography industry uses the term interchangeably. If you want a landscape photo, you simply rotate the dimensions to 6 inches wide by 4 inches tall.
Can I print a 4×6 photo directly from my iPhone?
Yes, you can print directly from an iPhone, but you must be careful. iPhones shoot photos in a 4:3 aspect ratio. A 4×6 print requires a 2:3 ratio. If you print without cropping, the printer will automatically chop off the top and bottom of your image. You should crop the photo in the Photos app using the “2:3” setting before sending it to the printer.
How many megabytes is a 4×6 photo?
File size depends heavily on the image’s complexity and your chosen compression settings. A high-quality JPEG sized at 1200×1800 pixels typically takes up between 1.5 MB to 3 MB of storage space. An uncompressed TIFF file of the same dimensions can easily exceed 6 MB.
Why does my 4×6 print look blurry even though it looks fine on my computer?
Computer monitors only require 72 pixels per inch to display a sharp image. Printers require 300 pixels per inch. A photo that is 300×450 pixels will look crisp on your screen but will print terribly blurry because it lacks the dense pixel data a printer needs for a 4×6 area.
What is the aspect ratio of a 4×6 photo?
A 4×6 photo utilizes a 2:3 aspect ratio. This mathematical ratio perfectly matches the native image format produced by traditional 35mm film cameras and modern full-frame DSLR or mirrorless cameras.
Do I need to leave a bleed edge when resizing to 4×6?
If you print at a professional lab, they occasionally trim 1-2 millimeters off the edges of the paper during processing. Professional photographers call this the “bleed.” To stay safe, keep important subjects (like faces or text) at least 1/8th of an inch away from the very edge of your digital file.
Conclusion
Understanding the 4×6 photo actual size bridges the frustrating gap between digital photography and physical printmaking. Once you grasp the simple math behind the 2:3 aspect ratio and the necessity of the 1200×1800 pixel count, you gain complete control over your final output.
Photoshop offers unparalleled precision, allowing you to crop, resize, and resample your images perfectly. By following the step-by-step methods outlined in this guide, you guarantee that every photograph you send to the lab returns sharp, beautifully composed, and ready for framing. Protect your memories by mastering the technical dimensions behind the art.
Add depth to perfectly sized photos. Discover how to add realistic shadows in Photoshop with this step-by-step guide.
Keep reading
All articles
Best Photo Slideshow Apps 2026 – Free & Professional Makers
Do you remember the last time you scrolled through a social feed and paused for a beautiful photo montage? Those smooth transitions,…
Read article
Photography Basics: The Complete Beginner’s Guide
Entering the World of Photography The Magic of Capturing Light Photography combines science, art, and personal vision into a single press of…
Read article
How to Turn a Picture into a Line Drawing in Photoshop
Why Master the Digital Line Art Conversion Process? Transforming a standard photograph into a clean, elegant line drawing represents one of the…
Read article