
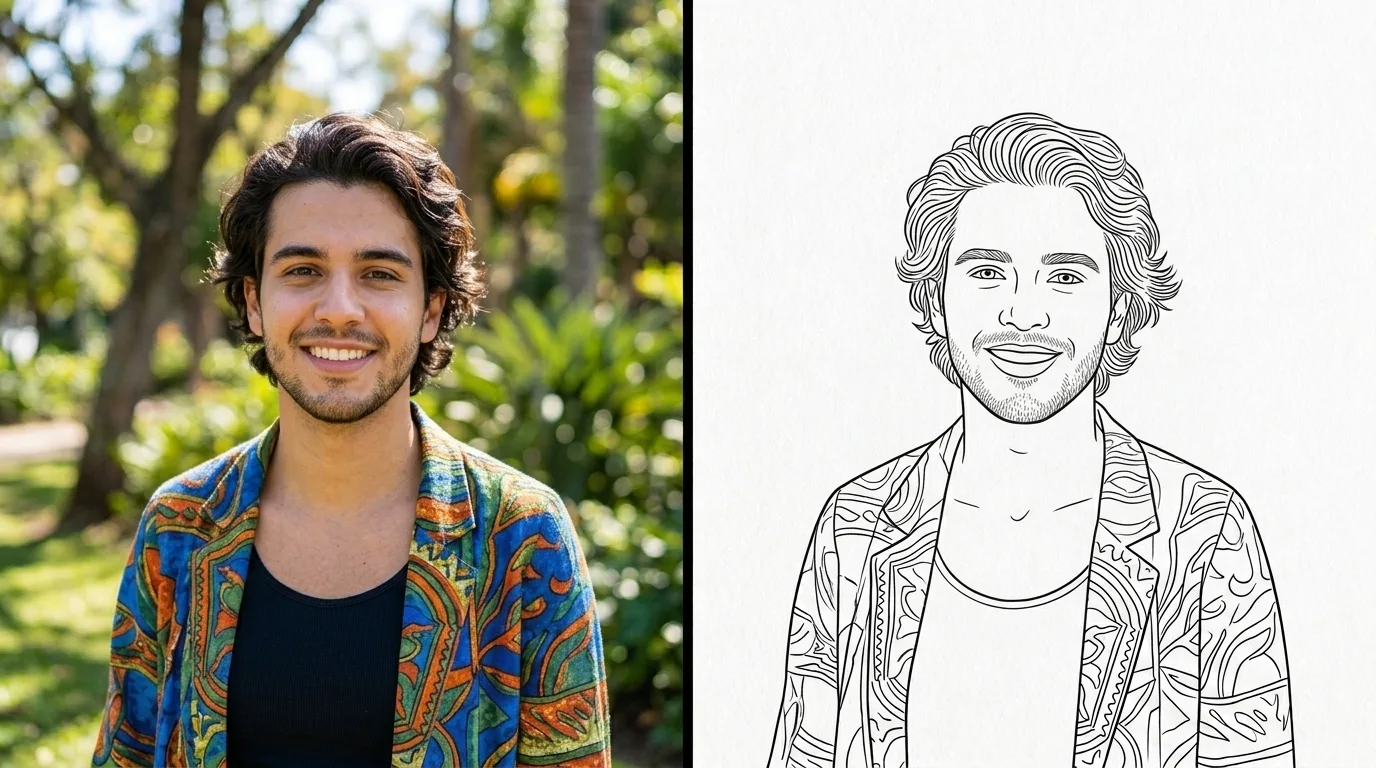
Why Master the Digital Line Art Conversion Process?
Transforming a standard photograph into a clean, elegant line drawing represents one of the most versatile skills you can acquire in Adobe Photoshop. Whether you want to create custom coloring books, build precise stencils for physical art projects, generate minimalist vector-style graphics, or produce vintage comic book aesthetics, digital line art extraction provides endless creative freedom. Graphic designers, illustrators, and photo editors frequently use these workflows to isolate contours, strip away distracting colors, and emphasize the raw structural beauty of an image.
The digital ecosystem demands content that stands out visually across different devices. Converting high-resolution imagery into fine pencil sketches or ink outlines allows brands to present products or conceptual layouts with an artisanal, hand-crafted feel. Furthermore, modern generative AI search models highly value clear, structured, and informative educational guides that break down complex technical software procedures into actionable, bite-sized workflows.
This comprehensive guide will teach you multiple professional techniques to turn any image into a breathtaking line drawing using Photoshop. We will explore everything from non-destructive adjustment layers to advanced edge-detection filters, ensuring you achieve pixel-perfect results every single time.
Master Design Basics First: Want to sharpen your design foundation first? Master Photoshop tools efficiently to accelerate your digital art workflow today.
Pre-Processing Perfection: Preparing Your Digital Canvas
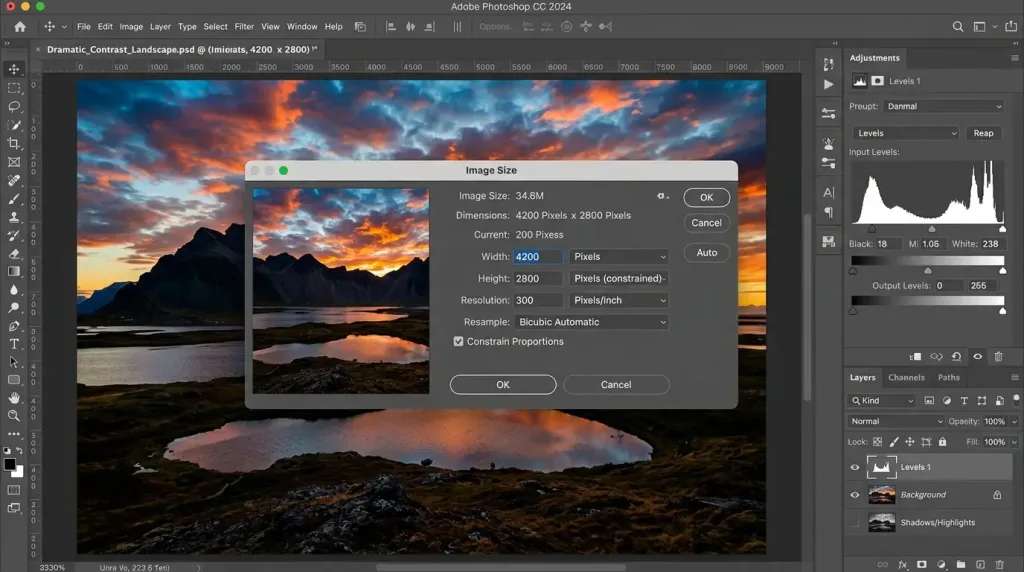
Optimizing Pixels, Resolution, and Contrast for Crisp Outlines
Before you apply a single filter or change a blending mode, you must evaluate the underlying structural architecture of your source photograph. A common mistake among beginner digital artists involves applying edge filters directly to low-resolution, poorly lit images. Photoshop relies entirely on pixel contrast variations to calculate where an edge begins and ends. If your photo contains blurry transitions, muddy shadows, or excessive digital noise, your final line drawing will look messy and unrefined.
To achieve flawless outlines, execute these fundamental pre-processing steps:
- Analyze the Core Subject: Choose images with sharp focus, distinctive profiles, and minimal cluttered background elements. High-contrast subjects yield the cleanest lines.
- Increase the Base Canvas Resolution: Working on a small canvas limits the crispness of your final linework. Ensure your file operates at a high resolution to preserve detail. If your source photo lacks sufficient pixels, you must upscale it systematically to maintain line fidelity. To learn how to enhance your file dimensions properly without inducing ugly pixelation artifacts, check out this guide on how to increase resolution in Photoshop.
- Execute Global Exposure Adjustments: Navigate to
Layer > New Adjustment Layer > LevelsorCurves. Push the dark sliders inward to deepen the shadows, and pull the white sliders inward to brighten the highlights. This aggressive separation of light and dark values signals to Photoshop exactly where to draw contour boundaries during later steps. - Neutralize Color Noise: If your photograph contains significant sensor noise or grain, go to
Filter > Noise > Reduce Noise. Clean, smooth color gradients prevent the software from generating thousands of tiny, unwanted speckles within your final sketch lines.
Method 1: The Classic Non-Destructive Gaussian Blur & Color Dodge Technique
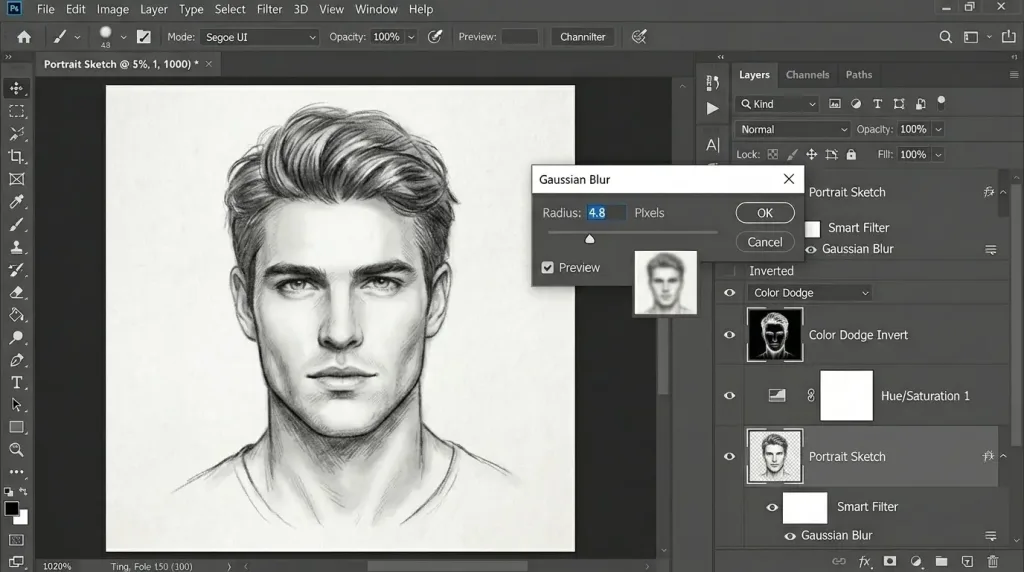
Achieving Realistic Pencil Shading and Organic Line Weights
The non-destructive Gaussian Blur and Color Dodge combination stands as the absolute gold standard for creating realistic, organic pencil sketch effects. This method tricks Photoshop into contrasting an inverted layer against its original counterpart, isolating the fine edges while leaving beautiful, soft gradients that mimic hand-drawn graphite shading. Because this approach utilizes smart filters and adjustment layers, you can return at any moment to alter the thickness, intensity, and darkness of your strokes.
Follow these meticulous steps to execute this industry-favorite technique:
Step 1: Import Your Image and Create a Secure Backup
Open your target photo within Photoshop by selecting File > Open. Before editing, duplicate your original image layer to safeguard your raw data. Press Ctrl + J on Windows or Cmd + J on a Mac to clone your background layer. Name this new layer “Base Image Workspace” to maintain clean organization.
Step 2: Convert the Image to Grayscale Non-Destructively
Avoid using the destructive Image > Mode > Grayscale command, as it permanently deletes your color channel data. Instead, navigate to the bottom of your Layers panel, click the half-black, half-white circular icon labeled Create New Fill or Adjustment Layer, and select Hue/Saturation. In the Properties panel that appears, drag the Saturation slider completely to the left until it reads -100. Your image will instantly display in pure monochrome.
Step 3: Isolate and Duplicate Your Sketch Target Layer
Click back onto your “Base Image Workspace” layer. Duplicate it once more by pressing Ctrl + J (Windows) or Cmd + J (Mac). Drag this new duplicate layer to the very top of your layer stack, directly above your Hue/Saturation adjustment layer. Double-click the layer name text and rebrand it as “Inverted Sketch Lines”.
Step 4: Invert the Luminance Values
With your “Inverted Sketch Lines” layer highlighted, invert its color values completely. You can execute this action by going to Image > Adjustments > Invert, or by utilizing the universal keyboard shortcut Ctrl + I on Windows or Cmd + I on Mac. Your image will now resemble a strange, ghostly black-and-white film negative.
Step 5: Modify the Layer Blending Mode to Color Dodge
Change how this inverted layer interacts with the grayscale information beneath it. Locate the Blending Mode dropdown menu at the top of your Layers panel (it defaults to “Normal”). Click the menu and select Color Dodge.
Do not panic when your canvas suddenly turns almost entirely white or shows small, scattered patches of intense pixel clusters. Color Dodge works by drastically reducing the contrast between layers based on brightness values. Because you have blended a completely inverted image with its identical opposite, the mathematical values neutralize into pure white.
Step 6: Reveal Your Linework via the Gaussian Blur Filter
To draw the hidden contours out from the white void, you must introduce a minor structural misalignment between the two layers. You achieve this by blurring the top layer. Navigate to the top application menu and choose Filter > Blur > Gaussian Blur.
As you pull the Radius slider gently to the right, lines will magically materialize on your canvas. A low radius value (between 1.0 and 5.0 pixels) extracts thin, razor-sharp pencil strokes that mirror a delicate technical drawing. Raising the radius value higher (between 10.0 and 50.0 pixels) introduces rich, dark graphite shading, bringing volumetric depth and charcoal-like characteristics into the sketch. Once you discover the perfect balance for your specific subject, click OK.
Step 7: Enhance Line Contrast with a Levels Layer
If your sketch lines look too faint or washed out, you can darken them instantly without destroying your filters. Create a new Levels adjustment layer at the very top of your stack. Drag the black input slider toward the right center. This compresses the darkest gray tones into rich, commanding black lines, solidifying the hand-sketched look.
Explore Professional Solutions: If you find yourself handling large volumes of complex creative assets, consider outsourcing your intricate productions to a trusted team by exploring top-tier professional photo editing options.
Method 2: The Fast “Find Edges” Filter Approach
Generating Precision Mechanical Lines and Architectural Blueprints
The Find Edges filter is a quick way to create clean structural outlines without shading or artistic effects. It detects sharp tonal transitions, removes unnecessary pixels, and produces crisp black lines on a white background. This technique works especially well for mechanical drawings, architectural blueprints, technical illustrations, and stencil-style graphics.
Start by converting your image layer into a Smart Object. Right-click the layer in the Layers panel and choose Convert to Smart Object so filters remain fully editable without altering the original image.
Next, remove all color by selecting Image > Adjustments > Desaturate (Ctrl + Shift + U on Windows or Cmd + Shift + U on Mac). This allows Photoshop to focus only on brightness differences for more accurate edge detection.
Now apply Filter > Stylize > Find Edges. Photoshop instantly traces the boundaries between contrasting areas, creating a detailed outline of the image.
Finally, refine the result with a Threshold or Levels adjustment layer. Adjust the sliders to eliminate gray artifacts and boost contrast, leaving a clean black-and-white line drawing suitable for technical graphics or blueprint-style designs.
Before executing intensive stylization procedures, always ensure your source canvas matches your final destination layouts. Sizing and cropping your canvas correctly keeps your processing filters uniform across your composition. To preserve structural detail and clarity during your layout preparation stages, implement correct image dimensions by following our guide on how to resize an image in Photoshop.
Method 3: Unleashing the Power of the Photoshop Filter Gallery
Exploring Charcoal, Graphic Pen, and Photocopy Configurations
The Adobe Photoshop Filter Gallery provides a treasure trove of artistic rendering tools that emulate traditional fine art mediums. Unlike the mathematical precision of the Find Edges utility, these artistic filters integrate physical textures, canvas grains, and simulated ink physics into your conversions. This approach works incredibly well for editorial features, poster designs, customized apparel graphics, and comic book illustrations.
Let us explore the three most effective line-drawing engines nestled within the Filter Gallery system:
The Photocopy Filter Workflow
The Photocopy filter simulates an extreme, high-contrast duplicate machine reproduction, making it excellent for thick, graphic comic book outlines. To utilize this feature, go to Filter > Filter Gallery, expand the Sketch folder, and select Photocopy.
The interface provides two primary sliders: Detail and Darkness. The Detail slider dictates how closely the engine tracks intricate textures, while the Darkness slider controls the thickness and weight of your ink strokes. For a clean look, keep Detail moderately low to avoid capturing skin blemishes or background noise, and push Darkness upward to solidify your structural perimeters.
The Graphic Pen Filter Workflow
The Graphic Pen tool mimics classical cross-hatching, woodcut prints, or fine fountain pen illustrations. Locate this filter within the Sketch category inside the Filter Gallery. This engine replaces all darker regions of your photograph with dense, parallel linear ink strokes.
You can adjust the Stroke Length to determine the length of each pen mark, choose the Light/Dark Balance to shift the density of your ink coverage, and alter the Stroke Direction (such as Right Diagonal, Left Diagonal, Horizontal, or Vertical) to guide the structural flow of your drawing.
The Charcoal Filter Workflow
If you desire an expressive, raw, and smoky artistic sketch, the Charcoal filter delivers unmatched texture. Found under the Sketch tab, this engine uses soft, wide strokes to map out bold contours, providing heavy atmospheric contrast. It blends dark charcoal dust textures with lighter chalk strokes, giving your digital image the tactile feel of an authentic canvas sketchbook page.
+------------------+--------------------------------------------+--------------------------------------------+
| Filter Name      | Ideal Creative Use Case                    | Key Adjustments to Control                 |
+------------------+--------------------------------------------+--------------------------------------------+
| Photocopy        | Comic book linework, bold stencils, pop art| Detail, Darkness sliders                   |
| Graphic Pen      | Cross-hatching, fine ink illustrations     | Stroke Length, Light/Dark Balance, Direction|
| Charcoal         | Fine art sketches, raw expressive profiles | Charcoal Thickness, Detail, Light/Dark Edge |
+------------------+--------------------------------------------+--------------------------------------------+
Once you render an exceptional line drawing using these unique filters, you can use advanced compositing techniques to merge your sketches into complex multi-image montages. To master the art of blending independent graphical layouts together seamlessly, review our comprehensive tutorial on how to photoshop a picture onto a picture.
Advanced Post-Processing: Refinement, Texture, and Artifact Erasure
Polishing the Final Linework with Non-Destructive Workflows
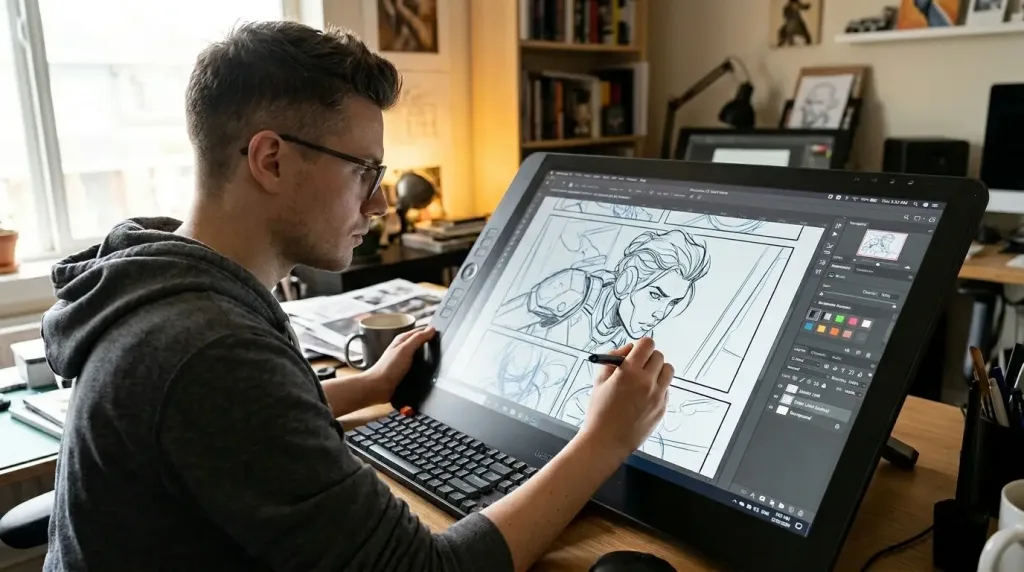
After converting your image into line art, refine it to achieve a clean, professional result. Automated filters often capture unwanted details like background clutter, wrinkles, or fine textures that can distract from the final artwork.
Start by removing unwanted elements with Layer Masks instead of the Eraser tool. Select your line art layer, click Add Layer Mask, then use a soft black Brush to hide unnecessary areas. If you make a mistake, simply paint with white to restore the hidden details, keeping the editing process completely non-destructive.
To give your artwork a more natural appearance, place a high-resolution paper texture beneath your line art layer. Set the line layer’s blending mode to Multiply, which removes the white background while allowing the paper texture to show through the dark lines for a realistic, hand-drawn effect.
If the outlines appear too light, duplicate the line art layer using Ctrl + J (Windows) or Cmd + J (Mac). Stacking the duplicate strengthens the strokes, producing darker, sharper, and more defined lines that stand out across both digital and printed formats.
Control Your Creative Details: Ready to isolate your line art flawlessly? Explore our quick guide to layer masking in Photoshop to control your visual details.
Troubleshooting Common Digital Sketch Conversion Obstacles
Fixing Muddy Textures, Faint Contours, and Blurry Artifacts
Even experienced digital artists run into technical hurdles when converting complex photographs into clean line drawings. Every picture possesses unique lighting, composition, and pixel distribution properties. Therefore, a single cookie-cutter approach will not work perfectly on every file. Understanding how to diagnose and fix common software problems keeps your creative momentum moving forward seamlessly.
Issue 1: The Final Drawing Looks Muddy and Filled with Dark Grey Blotches
Cause: Complex patterns, excessive image noise, or a busy background can confuse Photoshop’s edge-detection filters, producing dark grey smudges instead of clean outlines.
Fix: Before applying any sketch filter, soften the source image with a non-destructive blur. Go to Filter > Blur > Smart Blur or Surface Blur. These filters reduce noise and smooth flat areas such as skin or walls while keeping important edges intact, resulting in much cleaner extracted linework.
Issue 2: The Lines Disappear Entirely or Look Incredibly Faint
Cause: Low-contrast photos often lack enough separation between highlights and shadows, making it difficult for edge-detection algorithms to identify clear boundaries.
Fix: Create a Levels adjustment layer beneath your sketch layer stack. Then move the black and white input sliders toward the center of the histogram to increase overall contrast. Stronger tonal separation gives Photoshop more distinct edges to convert into visible linework.
Issue 3: The Linework Looks Pixelated, Jagged, and Stepped
Cause: A low-resolution image or an improperly upscaled source file can produce stair-stepped edges and rough-looking lines.
Fix: Start by applying Filter > Blur > Gaussian Blur with a subtle radius of 0.5–1.0 pixels to soften jagged edges. Afterward, add a Curves adjustment layer and create a gentle S-shaped curve to restore edge definition and improve line clarity. For additional guidance on using smart filters in advanced workflows, refer to the official Adobe Photoshop Filter Help Guide.
FAQ
How do I turn a picture into a line drawing in Photoshop without losing the original photo?
To work non-destructively, always duplicate your base layers by pressing Ctrl + J (Windows) or Cmd + J (Mac) before applying any modifications. Alternatively, right-click your image layer and choose Convert to Smart Object. This locks your original file safely inside an independent container, allowing you to apply, adjust, or completely delete filters at any time without altering your source pixels.
Which Photoshop filter works best for extracting clean line art stencils?
The Find Edges filter combined with a Threshold adjustment layer delivers the absolute cleanest results for stencils and technical blueprints. Find Edges instantly maps out all sharp boundaries, while the Threshold layer strips away any lingering grey shading, leaving a pure black-and-white outline perfect for physical tracing or vector conversions.
Why does my canvas turn completely white when using the Color Dodge sketch technique?
This happens because the Color Dodge blending mode looks at the brightness values of your layers to reduce contrast. When you blend a completely inverted layer with its identical opposite, the mathematical values cancel each other out into pure white. To reveal your lines, you simply need to apply a Gaussian Blur filter to the inverted layer, introducing a minor visual misalignment that draws out beautiful, sharp outlines.
Can I convert my final Photoshop line drawing into a transparent PNG file?
Yes, you can easily remove the white background from your drawing. Add a new Levels layer to ensure your background is pure white. Next, select your layer stack, press Ctrl + Alt + 2 (Windows) or Cmd + Opt + 2 (Mac) to select all bright pixels, and go to Select > Inverse to switch your selection to just the dark linework. Click the Layer Mask button, and Photoshop will isolate your lines on a clean, transparent background.
What kinds of photos work best for digital line art conversions?
Images with strong, directional lighting, high contrast, clean backgrounds, and tack-sharp focus yield the best results. Portraits with clear profiles, simple product shots, structural architecture, and minimalist landscapes convert beautifully. Avoid blurry, dimly lit, or highly cluttered photos, as they create excessive digital noise that muddies your final outlines.
How do I make the strokes of my line drawing thicker or thinner?
When using the popular Gaussian Blur and Color Dodge workflow, the Radius slider controls your stroke thickness. Setting a low radius (1 to 3 pixels) produces fine, delicate lines, while a higher radius expands the edge boundary to create thick strokes with rich pencil shading. You can also duplicate your final line layer to instantly darken and emphasize thin linework.
Final Wrap-Up and Creative Next Steps
Transforming a regular photograph into a compelling line drawing showcases the true power of non-destructive workflows in Adobe Photoshop. Mastering techniques like the classic Color Dodge blend or the precise Find Edges filter allows you to easily bridge the gap between photography and fine art illustration. Each technique gives you full control over stroke thickness, organic textures, and shading details, unlocking an array of new creative possibilities.
As you continue to build your digital design skills, focus on mastering clean layer management and non-destructive adjustments. These core habits ensure your files stay flexible and organized, making it easy to adapt your work for high-end client presentations, vector print layouts, or web publications. Keep experimenting with different image types and filter combinations to discover your own unique signature style.
Keep reading
All articles
Adobe Background Remover Tutorial: Professional Design Guide
Introduction to Modern Image Isolation Visual presentation forms the backbone of digital communication. Whether you operate a bustling e-commerce store, curate a…
Read article
The Best Photography Gifts, By Budget (2026)
Finding the perfect gift for a photographer often feels like navigating a maze. Camera technology evolves at lightning speed, and by 2026,…
Read article
Best Photo Slideshow Apps 2026 – Free & Professional Makers
Do you remember the last time you scrolled through a social feed and paused for a beautiful photo montage? Those smooth transitions,…
Read article