
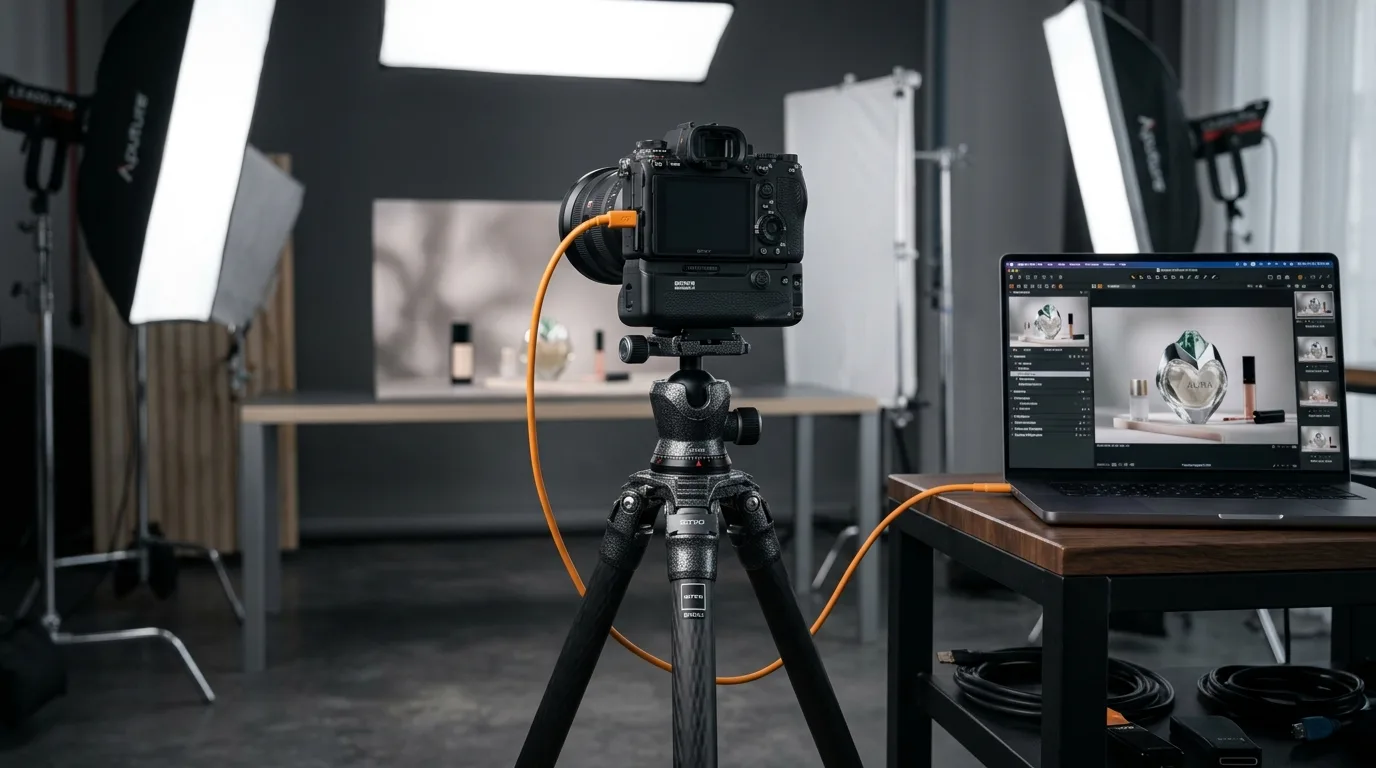
In the modern e-commerce landscape, high-quality visual content drives conversion rates more than almost any other variable. As global online marketplaces become intensely crowded, basic product images fail to capture consumer attention or build brand authority. Modern consumers demand hyper-realistic, high-fidelity visuals that communicate texture, material quality, and real-world scale within a single glance.
A professional product photography setup serves as the vital bridge connecting raw browser interest with a verified checkout transaction. Whether you manage a boutique online storefront or direct a high-volume commercial production facility, optimizing your physical environment ensures absolute technical precision. This comprehensive guide outlines the essential studio gear, precision lighting configurations, and master-level execution techniques required to produce world-class imagery.
Discover how selecting the best Nikon lens for product photography instantly elevates your e-commerce listings and drives customer engagement.
Camera Systems for High-Impact Product Photography
The Dominance of High-Resolution Mirrorless Cameras
Mirrorless technology firmly dominates the commercial photography industry by offering unmatched optical clarity, electronic precision, and seamless software integration. Modern mirrorless camera bodies provide real-time exposure previews directly through their electronic viewfinders, which drastically minimizes the need for time-consuming test shots. This single feature saves commercial studios hundreds of operational hours during high-volume catalog production cycles.
High-resolution sensors capture the microscopic details of intricate fabrics, fine jewelry engravings, and delicate cosmetic textures. When choosing a camera body for commercial assets, prioritize models that offer clean, uncompressed RAW data output and pixel-shift multi-shooting modes. Top-tier brands continuously update their firmware to integrate flawlessly with advanced tethering hardware, enabling instantaneous file transfers to your studio workstation. You can check comprehensive, objective sensor performance reviews on analytical platforms like DPReview to evaluate specific camera behavior under demanding studio conditions.
Full-Frame Sensors vs. Medium Format Alternatives
Choosing between a full-frame sensor and a medium format alternative depends entirely on your primary marketing channels, print requirements, and budget constraints. Full-frame sensors balance exceptional dynamic range with manageable file sizes, making them the absolute gold standard for digital e-commerce platforms and fast-paced social media campaigns. They feature a vast ecosystem of native lenses, giving you massive creative flexibility across diverse product categories.
Medium format camera systems offer unparalleled resolution and breathtaking color depth for luxury brands, hero marketing campaigns, and massive print advertisements. A medium format sensor records subtle color gradations and structural transitions that smaller sensors often compress or flatten entirely. However, these systems require a substantial financial commitment and naturally slow down operational workflows due to their massive file sizes. Carefully evaluate your long-term business goals before choosing the camera sensor architecture that aligns with your operational scale.
Optics Selection for Product Isolation
Macro Lenses for Intricate Textures and Jewelry
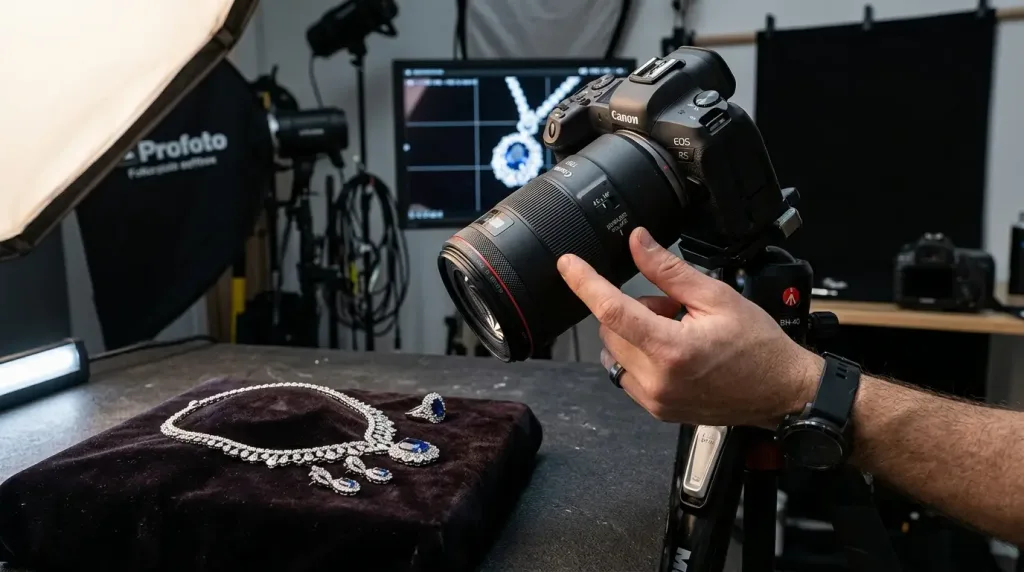
Product photography relies heavily on extreme optical precision to reveal minute design details that the naked eye easily misses. Professional macro lenses feature a true 1:1 reproduction ratio, which allows photographers to focus incredibly close to small objects without sacrificing sharpness. A dedicated macro lens guarantees flat, edge-to-edge clarity, completely eliminating the soft corners that frequently ruin images shot on standard consumer lenses.
When you photograph exceptionally small items like luxury timepieces, precious gemstones, or complex micro-electronics, a focal length between 90mm and 105mm provides an ideal working distance. This extended focal distance prevents the physical camera body from casting accidental shadows over your primary light sources. Investing in premier glass ensures that your camera sensor receives pristine, undistorted light. You can browse the latest optical technologies directly on the Nikon USA official platform to explore professional focal lengths tailored specifically for commercial close-up workflows.
Prime Lenses vs. Versatile Zoom Systems
Standard prime lenses offer unmatched optical sharpness and introduce minimal barrel distortion compared to variable zoom configurations. A fixed 50mm or 85mm prime lens provides a natural, distortion-free perspective for medium-sized consumer goods like footwear, luxury handbags, and packaged goods. Because prime lenses contain fewer internal glass elements, they reduce chromatic aberrations and maximize total light transmission efficiency.
Variable zoom lenses, such as a professional-grade 24-70mm f/2.8 system, provide incredible versatility when handling rapid shooting schedules with varying product dimensions. You can instantly reframe from a wide group shot to a tight, isolated product view without physically moving your heavy tripod base. While modern zoom lenses feature advanced multi-coatings that closely rival prime performance, they can still introduce subtle distortion at their extreme focal ends. Serious commercial professionals typically keep both options in their gear kits, deploying primes for critical hero shots and zooms for rapid catalog production.
Camera Stabilization Systems
Geared Heads and Heavy-Duty Tripods
A rock-solid tripod stands as an absolute necessity in a commercial product studio rather than an optional accessory. Product photography frequently utilizes slow shutter speeds, low native ISO settings, and multi-exposure bracketing to maximize overall sharpness and dynamic range. Even microscopic vibrations caused by studio floor movement or nearby traffic can instantly destroy fine textual details. Select a tripod constructed from multi-layered carbon fiber or high-grade aircraft aluminum to guarantee complete structural rigidity.
Pairing your heavy-duty tripod legs with a specialized geared head offers a massive advantage over traditional ball heads. Geared heads allow you to adjust the camera angle along three independent axes with millimeter-level precision via fine-tuning knobs. You can effortlessly correct minor perspective alignment errors, keeping your camera sensor perfectly level with your shooting surface. This granular control eliminates the tedious trial-and-error adjustments common with standard locking joints, vastly accelerating your physical staging workflow.
Overhead C-Stands and Boom Arms for Flat Lays
Flat-lay photography remains an incredibly popular and effective aesthetic style for apparel collections, culinary ingredients, cosmetics, and curated lifestyle layouts. Safely suspending a heavy commercial camera system directly over a styling surface requires heavy-duty studio C-stands anchored securely with heavy sandbags. A solid steel C-stand supports the extended weight of boom arms, heavy lenses, and tracking mounts without any risk of tipping over.
Master authentic shadow creation for e-commerce product photography to build immediate consumer trust and lower your online return rates.
When setting up an overhead shooting rig, utilize a specialized right-angle mount or an extension cross-arm to point the camera lens perfectly downward. Always balance the physical weight of your camera body and lens by securing matching counterweights to the opposite end of the boom arm. This structural equilibrium keeps your expensive equipment completely safe and allows you to execute micro-height adjustments smoothly throughout the day. Using a dedicated overhead setup ensures that every item on your flat-lay surface remains completely equidistant from the camera sensor, providing uniform focus across the frame.
Lighting Hardware and Modulation Strategies
Continuous LED Panels vs. High-Speed Studio Strobes
Achieving professional visual results requires a comprehensive mastery of studio light control and behavior. High-speed studio strobes remain the undisputed industry standard for freezing motion, capturing crisp liquid splashes, and delivering massive bursts of pure illumination. Strobes easily overpower ambient room light, granting the photographer complete authority over every shadow edge and highlight value within the frame. Their massive power output allows you to shoot at narrow apertures like f/11 or f/16 to maximize your native depth of field.
Continuous LED lighting panels have evolved significantly, offering powerful benefits for modern multi-disciplinary digital creators. High-CRI (Color Rendering Index) LED arrays allow you to see exact highlight placements and shadow fall-off in real time before you ever press the shutter button. This instantaneous visual feedback simplifies the lighting design process for developing photographers and streamlines hybrid workflows where you must shoot video clips and still images simultaneously. Ensure your continuous light sources possess a verified CRI rating above 95 to prevent problematic, color-correcting nightmares in post-production.
Softboxes, Striplights, and Scrim Arrays
Raw, unmodulated light from an bare flash tube or a raw LED chip creates harsh hot-spot reflections, blown-out highlight details, and distracting dark shadows. Commercial photographers utilize various modifier tools to alter the character, apparent size, and direction of their light sources. Large rectangular or octagonal softboxes spread light evenly over a broad surface area, beautifully mimicking the soft, flattering illumination of a large north-facing window.
Lighting Modifier Characteristics
| Modifier Type | Light Character | Primary Studio Use Case |
| Octabox | Ultra-soft, wrapping light with natural fall-off | Large products, lifestyle staging, apparel |
| Striplight | Narrow, highly controlled band of crisp light | Creating long edge highlights on glassware |
| Diffusion Scrim | Extremely soft, gradual gradient transitions | Eliminating reflections on chrome and metal |
| Snoot / Grid | Tight, pinpoint directional beam of hard light | Isolating small details, logos, or textures |
Striplights feature long, narrow profiles that generate highly controlled bands of light with rapid fall-off along the sides. These specialized modifiers excel at creating clean, linear gradient reflections along the curved edges of wine bottles, cosmetic tubes, and sleek consumer electronics. For absolute control over highly reflective materials, place large independent diffusion scrims directly between your light fixture and the product. This secondary diffusion layer removes harsh hot spots and creates beautiful, gradual tonality across metallic or glassy surfaces.
Constructing the Perfect Visual Background
Seamless Paper Sweeps and Cyclorama Tables
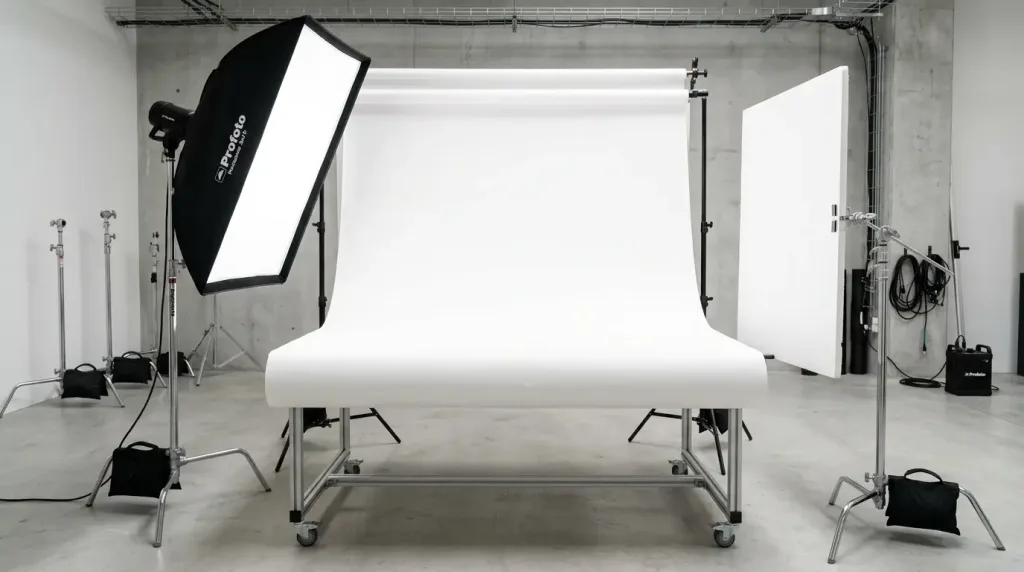
An effective product backdrop isolates your subject completely, eliminating visual clutter and guiding the consumer’s gaze directly to the product’s key features. Seamless paper sweeps offer a highly cost-effective, incredibly versatile solution for maintaining absolute background consistency across entire online inventories. Standard neutral colors like pure white, soft grey, and matte black provide the baseline for clean, highly standardized e-commerce catalogs.
For small to medium merchandise, a dedicated tabletop cyclorama or specialized shooting table offers incredible workflow efficiency. These tables feature a curved, translucent plastic or acrylic surface that completely eliminates the visible horizon line behind the product. By removing the sharp seam where a flat surface meets a vertical wall, you create an elegant illusion of infinite depth. This smooth gradient transition makes the item appear suspended gracefully in open space, giving your final image a sophisticated, high-end commercial aesthetic.
Using Acrylic Sheets for Natural Reflections
Introducing subtle reflections beneath an item can instantly elevate a standard product shot into a premium lifestyle advertisement. Placing a clean, polished sheet of black or white acrylic directly onto your shooting surface generates a sharp, elegant reflection that adds instant value. This specific technique works exceptionally well for luxury perfumes, high-end cosmetics, and premium electronic accessories.
Learn how to boost sales with shadow creation in product photography by generating realistic depth that captivates shoppers.
When utilizing highly reflective acrylic sheets, maintain absolute cleanliness throughout your entire studio session. Acrylic materials attract airborne dust particles and fabric lint via static electricity with remarkable speed. Keep premium microfiber cloths, anti-static brushes, and compressed air cans immediately at hand to clean the surface between every single exposure. Managing these minor details during the physical shoot saves you from hours of tedious cloning and healing work during the digital post-processing stage.
Mastering Camera Configurations and Settings
Achieving Maximum Sharpness with Focus Stacking
To capture commercial images where every single square millimeter stands out in razor-sharp focus, you must master advanced camera settings. Simply closing down your lens aperture to f/22 introduces optical diffraction, which paradoxically softens the overall image detail. Instead, set your lens to its optimal sharpness sweet spot, which typically lands between f/8 and f/11, and employ focus stacking techniques.
Step-by-Step Focus Stacking Workflow
- Lock Down the Gear: Secure your camera completely on a heavy-duty, stable tripod system.
- Switch to Manual: Set your lens to manual focus mode to prevent the camera from auto-adjusting.
- Establish the Start Point: Manually focus precisely on the closest physical edge of your product.
- Capture the Foreground: Take your first exposure using a remote cable release or an internal self-timer.
- Shift the Focus Ring: Rotate the focus ring slightly toward the center-midpoint of the item.
- Capture subsequent frames: Take the next exposure, ensuring absolutely zero physical camera movement occurs.
- Complete the Sequence: Repeat this incremental adjustment process until your focus reaches the furthest rear edge.
- Merge the Layers: Combine the captured frame layers inside specialized digital post-processing software.
Modern mirrorless cameras frequently feature automated focus bracketing modes directly within their internal software menus. When activated, the camera captures a rapid sequence of images while automatically shifting the internal focus elements from front to back. Combining these separate files during post-production ensures flawless, comprehensive sharpness from the immediate foreground to the furthest background.
Perfecting White Balance and Color Management
Accurate color representation directly reduces retail return rates and builds long-term consumer trust for your brand. If a customer receives an emerald green apparel item that appeared teal online, they will likely return it immediately. Avoid relying on your camera’s automatic white balance mode, as changing background colors or product surfaces can easily confuse the internal camera sensor.
To establish absolute color consistency across your entire production workflow, utilize a physical color calibration chart or a neutral grey card during setup. Place the target card directly in front of the product under your finalized studio lighting layout and capture a reference exposure. In your editing software, use the color-picker eyedropper tool on the neutral grey square to instantly calibrate your global white balance settings. This simple step ensures accurate color rendering regardless of the specific light fixtures or camera sensors used across different shoots.
Enhancing Captured Files in the Digital Darkroom
Modern Background Removal and Clipping Methods
While capturing the perfect image inside the camera remains crucial, professional post-production refines raw data files into polished commercial assets. The initial phase of an e-commerce editing workflow usually involves separating the product cleanly from its physical studio background. This clean separation allows digital design teams to place the item onto pure white web grids, creative marketing composites, or seasonal promotional banners.
For complex shapes, translucent materials, or intricate details like fur and fine hair, manual pen tool paths offer unrivaled edge accuracy. However, modern high-volume workflows frequently combine human craftsmanship with automated processing engines to handle massive catalog inventories efficiently. Utilizing specialized professional photo editing services allows growing businesses to scale their visual production rapidly without sacrificing edge quality. These services deliver clean, multi-layered files that integrate seamlessly into any web platform architecture or advertising layout.
Recreating Organic Shadow Profiles in Post-Production
Completely isolating an item from its original physical environment can accidentally strip away its natural weight and three-dimensional realism, making it look flat or artificial. To correct this common visual issue, post-production specialists manually reconstruct realistic drop shadows, cast shadows, or subtle ambient occlusion reflections. Adding an authentic shadow profile anchors the item visually, preventing it from appearing floating on a web page.
Streamline your production workflow using the top AI product pho editing tools for e-commerce stores 2026 to maximize daily output.
When building artificial shadows in post-production, always match the blur radius, light direction, and opacity to the original lighting setup. Software suites like Adobe Photoshop offer advanced blending brushes, gaussian blur parameters, and gradient masks to recreate these subtle light interactions. This precise detailing bridges the gap between raw photography and polished commercial art, creating an authoritative presentation that encourages immediate purchases.
Studio Setups for Diverse Product Categories
The Reflective Product Setup for Glass, Chrome, and Jewelry
Reflective objects act like tiny curved mirrors, capturing the entire studio environment, including the camera body, light fixtures, and the photographer. To photograph these challenging items successfully, you must deploy advanced indirect lighting strategies. Instead of pointing your light fixtures directly at the object, point them at large white foam core boards placed strategically around the subject.
To execute this architecture properly, fire your studio strobe through a large diffusion scrim directly onto the side of the product. Place large white foam core reflectors on the opposite side to bounce soft fill light back into the shadows. Position additional matte black flag cards right outside the frame to selectively block light from specific angles, which adds sharp contrast lines along the item’s edges. This intentional interplay of clean white highlight bands and rich black boundaries gives glass, liquid containers, and polished metals a striking, three-dimensional appearance.
The Apparel and Fashion Setup for Mannequins and Flat Lays
Apparel photography requires a strong focus on fabric texture, accurate fit, true-to-life colors, and clean presentation. Utilizing a ghost mannequin setup allows you to showcase the natural shape and drape of clothing without the visual distraction of a physical model. This technique involves photographing the garment on a specialized modular mannequin, then taking secondary shots of the interior tags, stitching, and inner linings.
During post-production, digital editors combine these separate exposures into a single, seamless composite image that highlights the entire product inside and out. If you prefer a more casual, modern lifestyle aesthetic, flat-lay setups offer a compelling and highly engaging alternative. Arrange the garments creatively on a textured wooden floor or a clean canvas background, using small pins and tissue paper padding to add inner volume. Position your primary light source at a shallow angle from the side to reveal the subtle textures of the fabric weave.
Future-Proofing Your Product Photography Studio
Building a highly efficient product photography setup requires a thoughtful blend of professional hardware, smart technical execution, and smooth post-production workflows. By choosing high-resolution mirrorless camera bodies, specialized macro lenses, and rock-solid stabilization gear, you set a strong foundation for long-term commercial success. Modulating your studio light sources carefully and managing your camera settings precisely allows you to capture raw data files full of rich, accurate detail.
As e-commerce platforms continue to advance, combining high-quality physical photography with modern digital editing techniques remains the ultimate strategy for brand growth. Consistently refining your studio environment ensures your visual assets remain intensely competitive, modern, and engaging to consumers. Focus on continuous improvement, keep your studio workspace highly organized, and let your unique visual storytelling drive your business forward.
Upgrade your visual marketplace storefront today by implementing the best AI photo editors for ecommerce product images seamlessly.
Frequently Asked Questions
Which camera settings work best for standard e-commerce product photography?
For standard product photography, operate in full Manual mode with your ISO set to 100 to minimize digital noise. Select an aperture setting between f/8 and f/11 to ensure optimal sharpness across the entire product body. Adjust your shutter speed based on your studio lights, and always use a sturdy tripod to eliminate any risk of camera shake.
How do I stop reflections from appearing on shiny or metallic products?
To control reflections on highly shiny items, use indirect bounce lighting instead of pointing your light sources directly at the subject. Place large white foam core boards or diffusion scrims around the product to create soft, uniform reflections. You can also use black matte cards right outside the frame to add contrast lines and define the item’s physical edges.
Is a macro lens necessary for photographing larger items like shoes or backpacks?
A dedicated macro lens is not strictly necessary for larger consumer goods like footwear, backpacks, or luggage items. Standard 50mm or 85mm prime lenses provide excellent, distortion-free perspective and exceptional sharpness for mid-sized products. Save your specialized macro lenses for close-up shots of small items like jewelry, luxury watches, or intricate cosmetic textures.
Why should I shoot in RAW format instead of JPEG for commercial work?
Shooting in RAW format captures the maximum amount of data and dynamic range your camera sensor can physically handle. This uncompressed file format grants you complete flexibility during post-production to correct exposure errors, adjust white balance details, and pull details from deep shadows. JPEG files discard this valuable data during internal camera compression, which significantly limits your editing options.
How does continuous LED lighting compare to traditional studio strobes?
Studio strobes offer powerful, instantaneous bursts of light that easily freeze fast motion and allow you to shoot at narrow apertures for deep focus. Continuous LED panels let you see exactly how highlights and shadows fall on your subject in real time before taking the shot. LEDs are excellent for developing photographers, hybrid workflows, and simultaneous video production.
What is focus stacking, and when should I use it in my studio?
Focus stacking is a technique where you capture multiple images of a product while slightly shifting the focus point from front to back. You then blend these separate exposures in editing software to create a single image with comprehensive edge-to-edge sharpness. Use this technique when photographing small items with intricate details that require a shallow depth of field.
Keep reading
All articles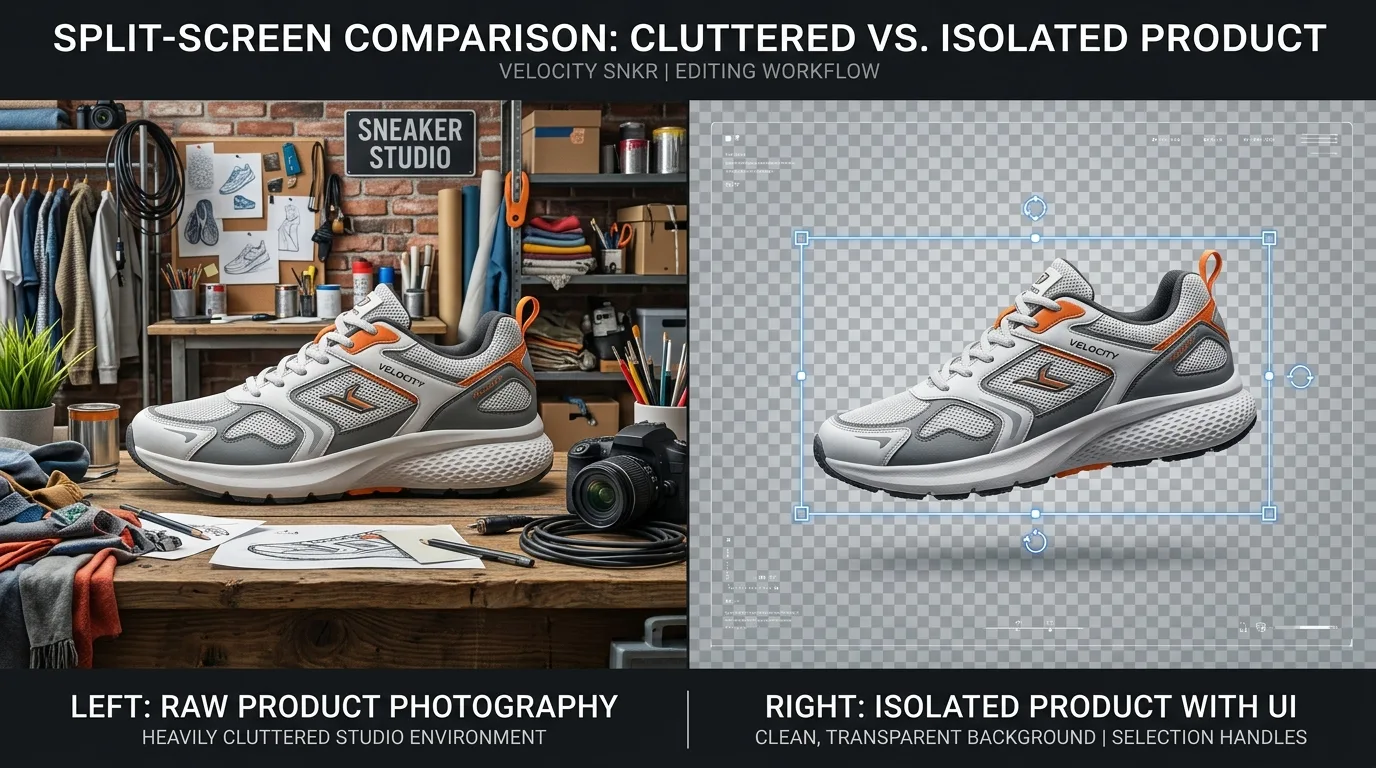
Adobe Background Remover Tutorial: Professional Design Guide
Introduction to Modern Image Isolation Visual presentation forms the backbone of digital communication. Whether you operate a bustling e-commerce store, curate a…
Read article
Adobe Express Background Remover Complete Guide for Creators
The Ultimate Guide to the Adobe Express Background Remover Creating stunning visual content requires clean, distraction-free imagery. Whether you design marketing materials,…
Read article
What Is Sports Photography? Cost, Types, and Real-World Examples
The roar of thousands of fans in a stadium, the squeak of sneakers on a polished basketball court, and the explosive impact…
Read article