

The Ultimate Guide to the Adobe Express Background Remover
Creating stunning visual content requires clean, distraction-free imagery. Whether you design marketing materials, craft social media posts, or build presentations, you need your main subjects to stand out. Distracting backdrops often ruin otherwise perfect photographs. In the past, isolating a subject required hours of tedious manual tracing using complex software. Today, smart technology simplifies this process immensely.
The Adobe Express background remover stands out as a top-tier solution for creators of all skill levels. It offers a seamless, fast, and highly accurate way to strip away unwanted scenery and leave behind perfectly isolated subjects. You can access this powerful utility directly from your web browser without downloading heavy applications.
This comprehensive guide explores everything you need to know about this tool. You will learn how to navigate the interface, master the exact steps for flawless cutouts, and understand advanced techniques to elevate your visual projects.
Want perfect commercial shots? Discover professional techniques for stunning white background product photography to elevate your digital storefront.
The Importance of Clean Subject Isolation
Visual hierarchy forms the foundation of good design. When someone looks at your graphic, their eyes should immediately find the most important element. Cluttered, messy backdrops fight for the viewer’s attention. By isolating your subject, you control exactly where the audience focuses.
Clean isolation instantly elevates the perceived quality of your brand. E-commerce stores rely heavily on transparent or pure white backdrops to make products look premium and trustworthy. Content creators use isolated portraits to build engaging YouTube thumbnails that drive clicks. Without a clean cutout, your graphics will look amateurish and rushed.
Furthermore, isolating subjects gives you ultimate creative flexibility. Once you extract a person or object, you can place them into entirely new environments. You can layer text behind them, add glowing drop shadows, or composite multiple images together to tell a compelling story. The Adobe Express background remover unlocks this flexibility with a single click.
Setting Up Your Workspace
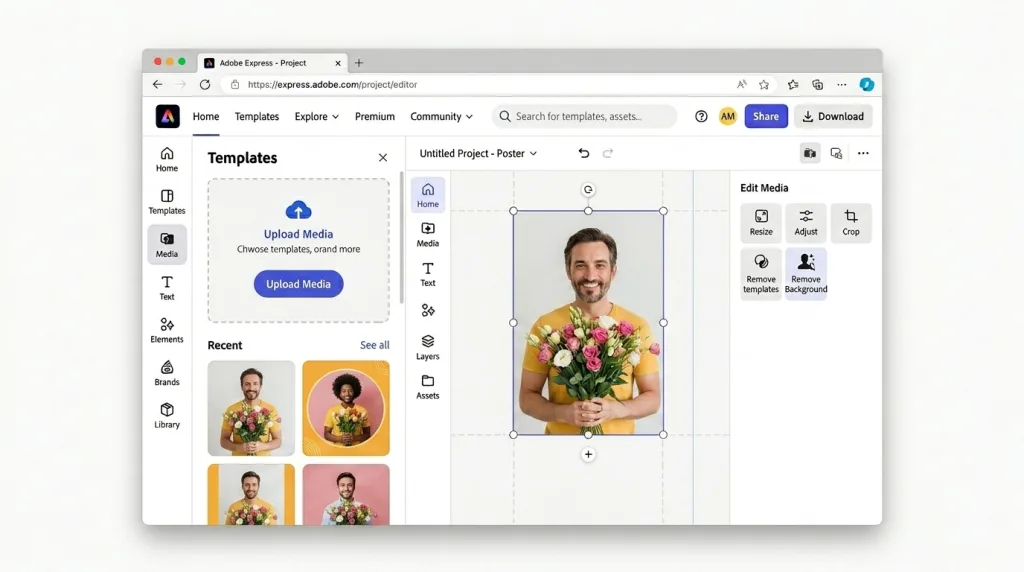
Before you start erasing, you need to access the platform. Adobe offers a straightforward onboarding process. You simply navigate to their website and sign in. You can use an existing account or create a new one using your email or social logins. The platform provides a generous free tier that includes access to the core erasure tools.
Once you log in, the main dashboard greets you. The interface looks clean, intuitive, and designed for quick actions. You do not have to hunt through endless menus to find what you need. The platform prominently features quick-action buttons right on the home screen.
You can initiate the process in two different ways. You can click the dedicated quick-action button on the dashboard, which opens a simple upload window. Alternatively, you can start a new design project, upload your photo to the canvas, and access the erasure utility from the image properties panel. Both methods utilize the same powerful computational engine.
Step-by-Step Erasure Process
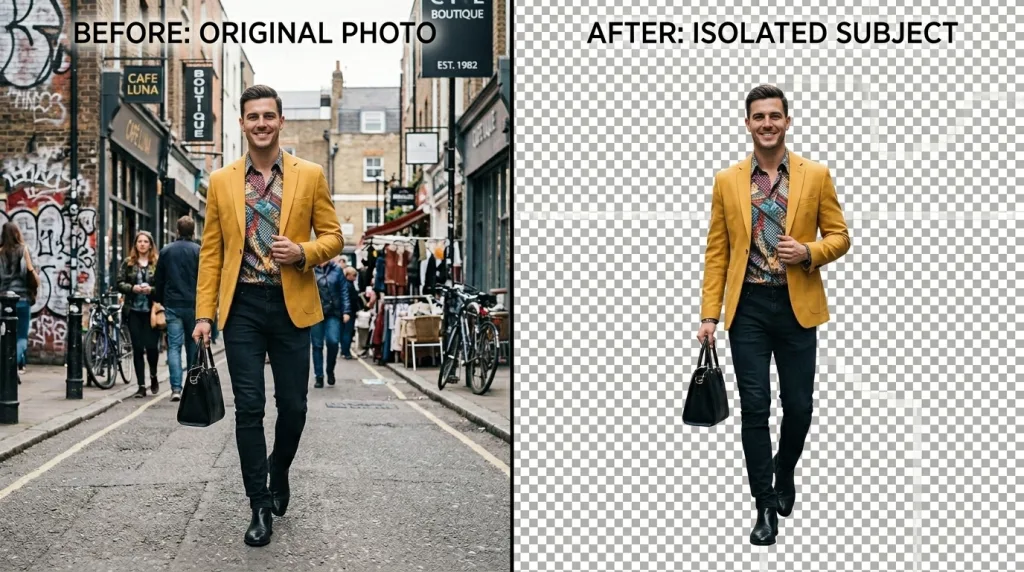
Achieving a perfect cutout takes only a few moments. Follow these exact steps to ensure you get the best possible result every single time.
First, select your target image. For the best results, choose a photograph where your subject contrasts well with the scenery behind it. High-resolution images yield much cleaner edges than blurry or pixelated files. You click the upload button and select the file from your computer or mobile device.
Second, let the system process the file. As soon as the upload finishes, the smart algorithm takes over. It analyzes the pixels, identifies the primary subject, and maps out the intricate boundaries. You simply wait a few seconds while a loading indicator spins on your screen. You do not need to click or drag anything during this phase.
Finally, review the result. The scenery disappears, replaced by a checkerboard pattern that indicates transparency. You can now download the isolated image directly to your device or continue editing it within the browser workspace. The platform handles the heavy lifting effortlessly.
Need precision for brand assets? Learn the exact steps to effectively remove background on logo designs for marketing materials.
Tackling Difficult Textures and Edges
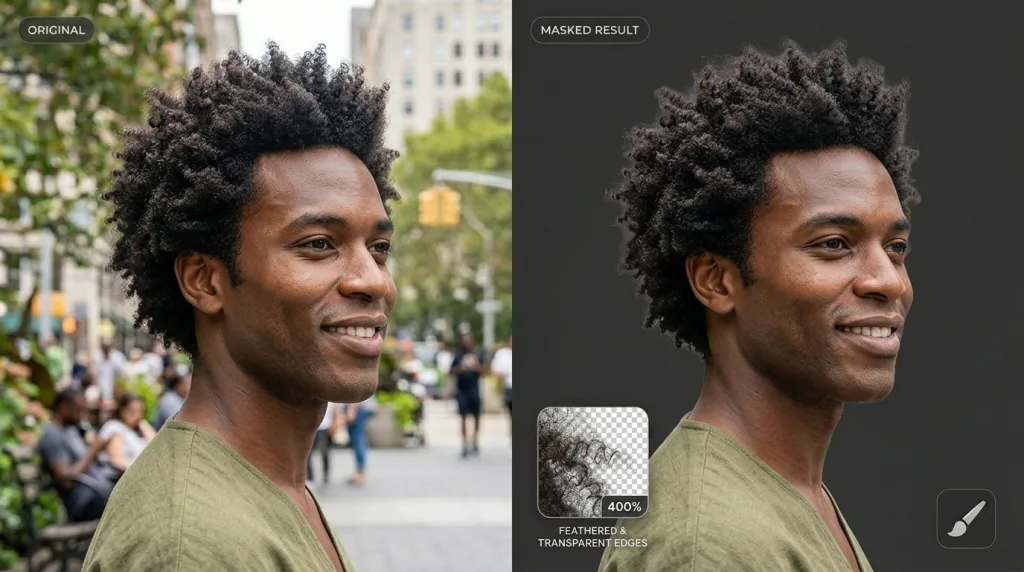
While smooth objects cut out easily, complex textures present unique challenges. Hair, animal fur, tree branches, and transparent materials like glass often confuse basic editing tools. These elements blend into their surroundings, making it difficult to define a hard boundary.
The computational engine inside this platform excels at handling these tricky edges. It uses advanced mapping to recognize strands of hair and fine details. Instead of creating a harsh, jagged line, the tool applies a soft, feathered edge that mimics natural depth of field. This ensures your subject looks realistic when placed over a new backdrop.
However, lighting plays a massive role in the tool’s success. If your subject stands in a dark room with heavy shadows blending into a dark wall, the system might struggle to find the exact edge. Always aim for well-lit photographs with clear separation between the foreground and the scenery.
Alternative Editing Methods
Sometimes, automated processes miss small details, especially in highly complex photographs. When you encounter an image that automated tools struggle with, you must rely on manual techniques to achieve perfection. Understanding how manual selection works makes you a more versatile creator.
Graphic designers often use pixel-based selection utilities to grab specific colors and tones. If you want to expand your skill set beyond one-click solutions, learning how to replace or remove an image background using the magic wand tool provides a massive advantage. This manual approach gives you total control over every single pixel.
Working with complex software? Master the essential techniques to seamlessly remove background in GIMP for your creative projects.
You should view automated tools and manual techniques as complementary skills. Use the quick-action button for 90% of your workflow to save time. Reserve the manual, intensive methods for the remaining 10% of highly complex, specialized images that require absolute precision.
Choosing the Right Export Formats
After you perfect your cutout, you must save it correctly. Selecting the wrong file format will ruin your hard work and replace your transparent canvas with a solid white block. You must understand the difference between common image extensions.
You must always export your isolated subjects as PNG files. The PNG format supports alpha channels, which store transparency data. When you save a PNG, the invisible areas remain invisible. This allows you to drag and drop the file into other software, over videos, or onto colorful website layouts without any ugly borders.
Conversely, you should never export an isolated cutout as a JPEG. The JPEG format does not support transparency. If you try to save a transparent image as a JPEG, the software will automatically fill the empty space with solid white pixels. This completely defeats the purpose of removing the scenery in the first place.
Creative Applications for Your Cutouts

Once you build a library of clean, isolated images, your creative possibilities expand exponentially. You no longer have to rely on boring, standard rectangular photographs. You can design highly dynamic, engaging compositions.
Social media marketers use cutouts to build thumb-stopping advertisements. They extract a product, place it on a vibrant, brand-aligned color block, and add bold typography. This creates a clean, modern aesthetic that performs exceptionally well on platforms like Instagram and Facebook.
Content creators rely heavily on cutouts for video thumbnails. They take expressive portraits of themselves, remove the cluttered room behind them, and place their face over an exciting scene related to the video topic. Adding a thick white outline around the isolated portrait further helps the subject pop off the screen and capture viewer attention.
Optimizing Your Creative Workflow
Efficiency matters when you manage large creative projects. If you need to process fifty product photos for an online store, doing them one by one feels incredibly tedious. You need to approach your workflow with a batch-processing mindset.
First, organize all your raw photographs into a single folder on your computer. Label them clearly. Next, open your web browser and navigate to the tool. Process each image sequentially. Do not stop to edit or tweak the colors during this phase. Focus solely on stripping away the scenery and downloading the transparent PNGs.
Save all the finished PNGs into a separate, dedicated folder. Once you finish the batch, you now have a complete library of isolated assets ready for assembly. This assembly-line approach saves hours of frustration and keeps your creative momentum flowing smoothly.
Common Pitfalls to Avoid
Even with powerful technology at your fingertips, human error can still derail your project. You must avoid several common mistakes to ensure your final graphics look professional and polished.
First, avoid using low-resolution source files. If your original image looks blurry or pixelated, the system cannot find sharp edges. The resulting cutout will look soft, jagged, and entirely unusable. Always shoot or download the highest resolution possible before you begin editing.
Second, beware of color bleed. If your subject wears a bright green shirt while standing against a bright red wall, the red light might reflect onto the subject’s skin and clothing. Even after you erase the red wall, that reddish tint remains on your subject. Photographers call this color casting. Pay close attention to the lighting environment when capturing your source photos.
Finally, do not forget about shadows. When you place an isolated person onto a new floor, they will look like they are floating in space unless you add a realistic drop shadow. You must ground your subjects in their new environment by manually painting subtle shadows beneath their feet or base.
Taking Your Designs Further
The Adobe Express background remover represents just the first step in the creative journey. Once you isolate your image, explore the rest of the platform’s powerful features. Thousands of premium templates, fonts, and design elements make it easy to transform a simple cutout into a polished design.
Built-in adjustment filters let you fine-tune color temperature, brightness, and contrast so your isolated subject blends naturally into its new background. Artistic effects can also transform an ordinary photograph into a stylized painting, duotone graphic, or other creative design. With so many editing tools available, the platform encourages experimentation and helps you create professional-looking visuals with minimal effort.
By mastering this simple but powerful utility, you free yourself from technical limitations. You spend less time wrestling with tedious masking paths and more time focusing on actual design and storytelling. Clean visual isolation forms the bedrock of modern graphic creation, and you now possess the knowledge to execute it flawlessly.
Ready for flawless cutouts? Find out how to correctly make background transparent to ensure your graphics look perfectly crisp everywhere.
Frequently Asked Questions
Does this tool work on mobile devices?
Yes, you can access the platform easily through mobile browsers or the dedicated application. The interface adapts perfectly to smaller screens, allowing you to process images, edit graphics, and export transparent files directly from your smartphone or tablet while on the go.
Can I restore parts of the image that were erased by mistake?
Yes, the workspace provides refinement tools. If the automated process accidentally removes a piece of your subject, you can select the restore brush. You simply paint over the missing area, and the original pixels reappear, giving you total control over the final edge.
What is the maximum file size I can upload?
The platform generally supports very large, high-resolution files to ensure excellent quality. While exact limits occasionally update, you can safely upload standard high-definition JPEGs and PNGs from modern DSLR cameras or smartphones without encountering compression issues or rejection errors.
Is this utility completely free to use?
Adobe provides core features, including the erasure utility, within their free tier. You can create an account and start processing images without entering payment details. Some premium templates and advanced export options require a paid subscription, but the basic isolation function remains highly accessible.
Why does my final image have a solid white box behind it?
You likely exported the final image in the wrong format. JPEGs do not support invisible pixels. To retain the transparency you created, you must always export your final file as a PNG. Ensure you select the “transparent” option in the download menu.
How does it handle complex edges like frizzy hair?
The computational engine uses advanced mapping techniques to recognize delicate structures like hair and fur. Instead of drawing a harsh line, it creates a feathered, soft edge that blends naturally. For the best results, ensure your original photo has good lighting and high contrast.
Can I remove the scenery from a video clip?
This specific quick-action tool focuses entirely on static images and photographs. Removing scenery from moving video requires different, specialized video editing software that tracks motion frame-by-frame, though Adobe offers other applications specifically designed for advanced video manipulation.
Do I lose image quality during this process?
The system preserves the original resolution of your subject. The only pixels removed are the ones making up the unwanted scenery. As long as you export your finished file at the highest quality settings, your isolated subject will remain just as crisp and sharp as the original photograph.
Keep reading
All articles
Understanding Aperture in Photography
You press the shutter button, and the camera captures a slice of light. Behind that simple click, a tiny mechanical iris inside…
Read article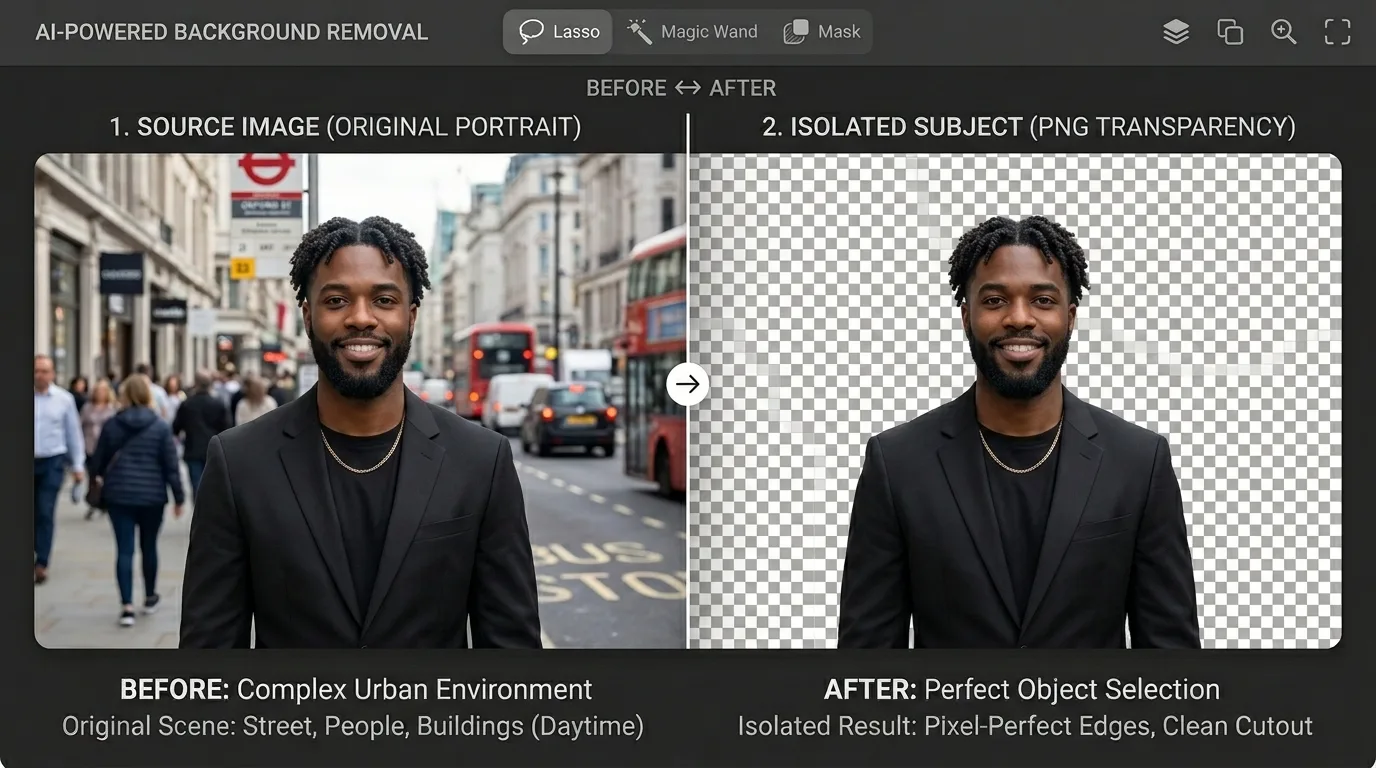
How to Remove Background in GIMP: Complete Step-by-Step
Introduction to Background Removal in GIMP Mastering photo editing requires a solid understanding of how to isolate subjects from their surroundings. You…
Read article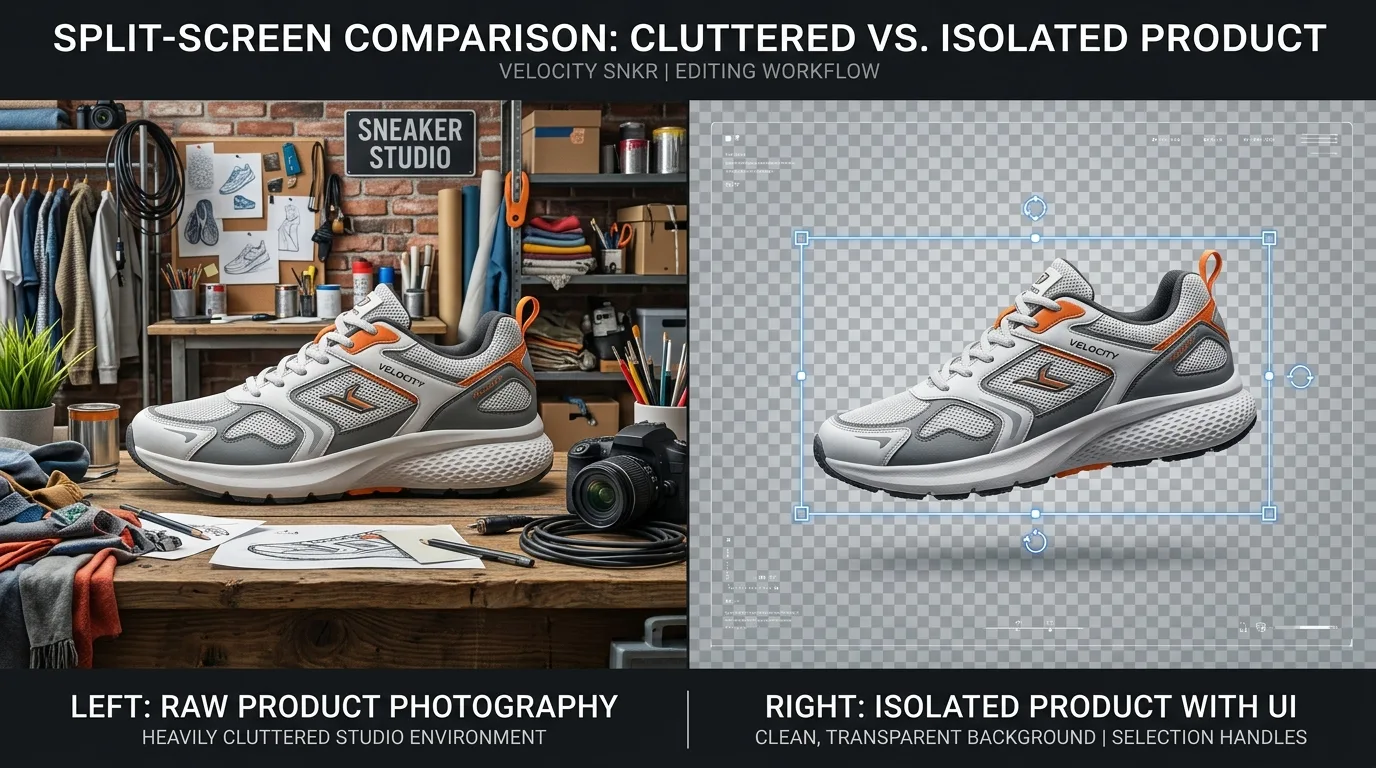
Adobe Background Remover Tutorial: Professional Design Guide
Introduction to Modern Image Isolation Visual presentation forms the backbone of digital communication. Whether you operate a bustling e-commerce store, curate a…
Read article